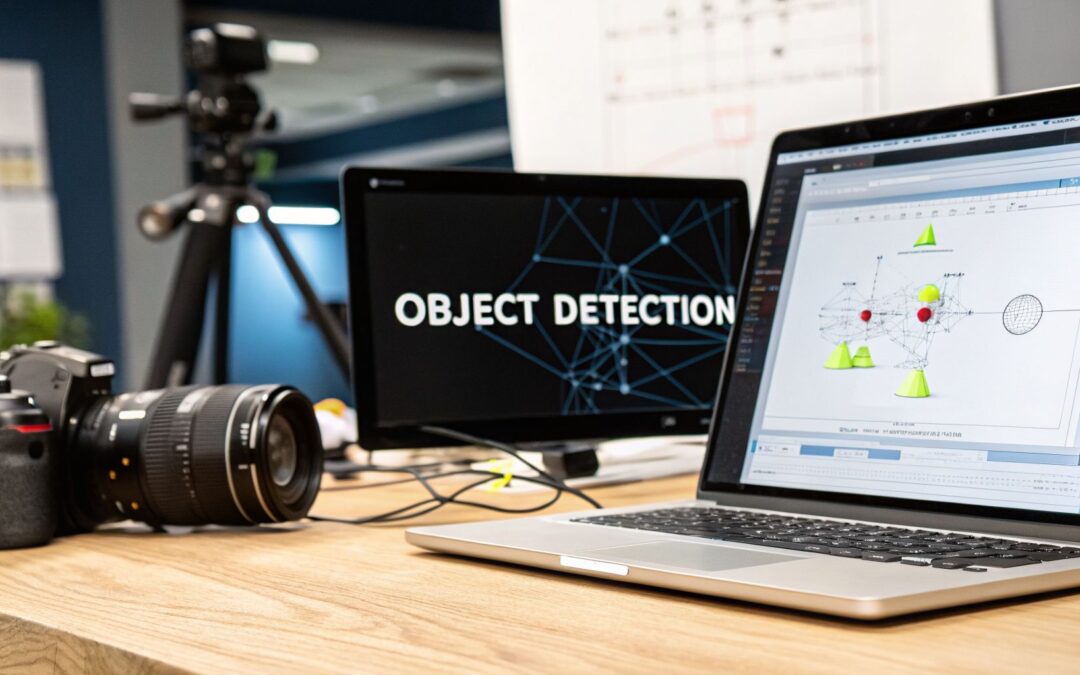
Object detection models are the brains behind everything from self-driving cars spotting pedestrians to retail analytics systems tracking inventory on a shelf. They’re a type of AI that can find specific items in an image or video and draw a neat box around them, telling you exactly what they are and where they are.
What Are Object Detection Models and How Do They Work
Let's say you show a computer a picture. A basic image recognition AI, known as an image classification model, might simply say, "There's a dog in this picture." That's helpful, but what if there are three dogs? And what if you need to know where they are?
That’s where object detection comes in. It goes a step further by not just answering "what" is in the image, but also "where." The model returns a list of every object it finds, complete with the pixel coordinates for a "bounding box" drawn around each one.
So how do they learn to do this? It's all about the training data. These models are fed millions of images that have been meticulously hand-labeled by humans. For every car, person, or stop sign, an annotator has drawn a precise bounding box and assigned the correct label. The quality of your model is a direct reflection of the quality of this annotated data—it's the textbook the AI studies to learn.
From Early Methods to Deep Learning
Object detection has come a long way. The early days were filled with clever but rigid algorithms built on hand-crafted features. A massive leap forward came in 2001 with the Viola-Jones algorithm, which made real-time face detection possible on everyday computers. By 2004, it was so effective that it was already powering face detection in over a billion cameras, laying the groundwork for much of what we see today. You can read more on the early history of object detection to see how these foundational ideas evolved.
But these classic methods had their limits. They often struggled with the huge variety of objects, angles, and lighting conditions found in the real world. The game truly changed with the arrival of deep learning and, specifically, Convolutional Neural Networks (CNNs). Instead of programmers telling the model what features to look for (like edges and corners), CNNs learn to identify the most important features all on their own, directly from the training data.
This shift gave us a huge boost in accuracy and flexibility, leading to two main families of modern object detection models:
Two-Stage Detectors: Models like Faster R-CNN are the methodical, careful thinkers. First, they scan the image to propose "regions of interest" where an object might be. Then, in a second step, they analyze just those regions to classify the object. It’s a thorough, two-step process.
One-Stage Detectors: Models like the YOLO family and SSD are built for speed. They look at the entire image just once to predict both the bounding boxes and the object classes simultaneously. This makes them perfect for real-time video analysis where every millisecond counts.
Understanding this split is key. Your choice will almost always come down to a trade-off: Do you need the meticulous accuracy of a two-stage detector, or the blazing-fast speed of a one-stage model?
When you get into the nitty-gritty of object detection, you’ll find that models are built on a few core architectural designs. These aren't just academic differences; they fundamentally change how a model works and directly impact the classic trade-off between speed and accuracy.
The two most established families are two-stage and one-stage detectors. Think of it as a choice between being a meticulous detective or a fast-acting first responder.
Two-Stage Detectors: The Accuracy-First Approach
A two-stage detector operates like a careful detective investigating a scene. It doesn’t try to solve the whole case at once. First, it scans the entire image to identify potential "regions of interest"—areas that likely contain an object. This is its first stage: proposing candidate regions.
Only after it has a shortlist of promising areas does it move to the second stage. Here, it dedicates its full processing power to carefully examine each proposed region, classifying the object and refining its bounding box.
This methodical, two-step process is all about maximizing accuracy. By focusing its analysis on a smaller, pre-qualified set of regions, the model can catch subtle details. This makes it a great fit for applications where precision is non-negotiable, like finding tiny defects in manufacturing or identifying small anomalies in medical scans.
As you can see below, object detection is a step up from basic image classification, adding the "where" to the "what." It provides the foundational location data that more complex tasks, like pixel-perfect segmentation, build upon.

One-Stage Detectors: Built for Speed
On the other hand, a one-stage detector is built for raw speed. Instead of a two-step process, it looks at the entire image just once, simultaneously predicting the object classes and their bounding box locations in a single pass.
Imagine it treating the image as a grid. In one go, it makes predictions for every single cell in that grid. It’s a unified, all-at-once approach that is incredibly efficient.
This design is what makes real-time object detection possible. When you need high frames-per-second (FPS) for a self-driving car’s perception system or for tracking players in a live sports broadcast, one-stage detectors are almost always the answer.
One-Stage vs. Two-Stage Detector Architectures
This table breaks down the fundamental differences between these two architectural philosophies.
| Characteristic | One-Stage Detectors (e.g., YOLO, SSD) | Two-Stage Detectors (e.g., Faster R-CNN) |
|---|---|---|
| Methodology | A single, unified pass to predict bounding boxes and classes. | A two-step process: first propose regions, then classify them. |
| Speed | Very fast; suitable for real-time video processing. | Slower due to the multi-step pipeline. |
| Accuracy | Historically less accurate, but modern versions have closed the gap. | Generally higher accuracy, especially for small or overlapping objects. |
| Primary Use Cases | Autonomous driving, live video analysis, security cameras. | Medical imaging, quality control, detailed scene analysis. |
While two-stage models traditionally held the accuracy crown, the performance gap has narrowed significantly. Clever innovations have made modern one-stage models strong contenders for a huge range of commercial projects. The choice really depends on what you need to prioritize for your specific application.
Transformer-Based Models: A New Way of Seeing
More recently, a third approach has entered the scene, borrowing ideas from the world of natural language processing: transformer-based models. These models, like DETR (DEtection TRansformer), throw out the old playbook of regions and grids.
Instead, they reframe object detection as a direct "set prediction" problem. You give the model an image, and it outputs a complete, unordered set of all objects it finds. It’s like asking a language model to list all the nouns in a sentence—it just gives you the final list.
This elegant approach gets rid of many of the complex, hand-tuned components that other architectures rely on, like anchor boxes and non-maximum suppression (NMS). While still a developing field, transformers are pushing the boundaries of what’s possible, showing great promise for simplifying detection pipelines and excelling at scenes with lots of crowded, overlapping objects.
A Deep Dive into Popular Object Detection Models

Now that we’ve covered the architectural blueprints, let's meet the models that have truly defined the field of object detection. Each one strikes a different balance between speed and accuracy, making them suitable for very different jobs. Knowing their strengths and weaknesses is the key to picking the right tool for your project.
We're going to walk through the four main families and models that every computer vision team should have in their toolkit:
- R-CNN Family (Two-Stage): The go-to choice for precision and detail.
- YOLO Family (One-Stage): Famous for its incredible speed and real-time performance.
- SSD (One-Stage): A clever one-stage model that was the first to use multi-scale feature maps.
- RetinaNet (One-Stage): An innovative model designed to fix the class imbalance problem that held back one-stage detectors.
The R-CNN Family: High-Accuracy Detectors
The R-CNN family really kicked off the modern era of object detection by setting a new standard for accuracy. Think of these two-stage detectors as the meticulous analysts of the computer vision world—they prioritize getting it right above all else.
The family’s big breakthrough was Faster R-CNN, which introduced the game-changing Region Proposal Network (RPN). This clever addition replaced slow, clumsy methods for finding potential objects with a fast, built-in neural network. For the first time, a high-accuracy model could actually approach real-time performance. The original R-CNN from 2014 shot the mean average precision (mAP) from 33.7% to 53.3% on the PASCAL VOC 2012 dataset. Just a couple of years later, Faster R-CNN’s RPN pushed performance to 5 frames per second with a 73.2% mAP, a development that powered 40% of autonomous driving prototypes back in 2016.
Mask R-CNN is a famous extension of Faster R-CNN. It adds a third task to the model: generating a pixel-perfect mask for each detected object. This turns it into an incredibly powerful tool for any project that needs to understand an object's exact shape, not just its location.
If your project depends on identifying fine-grained details—like finding tiny defects in a manufacturing line or analyzing medical scans—the R-CNN family is an excellent place to start. Just remember that this level of precision requires a lot of high-quality, perfectly annotated data to work its magic.
The YOLO Family: Built for Real-Time Speed
On the other side of the coin, you have the YOLO (You Only Look Once) family. As one-stage detectors, these models were designed from the ground up with a single goal in mind: speed. YOLO treats object detection as a simple regression problem, taking just one look at the entire image to predict all the bounding boxes and class probabilities at once.
This design makes YOLO models blazing fast, fast enough to process live video feeds in real time.
- YOLOv3 quickly became the benchmark for balancing speed and accuracy in a one-stage detector.
- The more recent YOLOv9 introduced sophisticated techniques like Programmable Gradient Information (PGI) to prevent information loss as data flows through the network, pushing performance even higher.
While the earliest YOLO versions trailed two-stage models in pure accuracy, that gap has narrowed dramatically. Today, modern YOLO variants are the first choice for countless commercial applications, from retail analytics and traffic monitoring to autonomous drones, where making a quick decision is everything.
SSD and RetinaNet: Key Innovators
While R-CNN and YOLO represent the two dominant philosophies, a few other models introduced brilliant ideas that pushed the whole field forward.
Single Shot MultiBox Detector (SSD) was another hugely influential one-stage model. Its secret sauce was using feature maps from different layers in the network to detect objects at various scales. This allowed it to find both big and small objects effectively in a single pass, something earlier one-stage models struggled with. For tasks where you need more detail than a box provides, take a look at our guide on what image segmentation is and how it works.
RetinaNet tackled a fundamental weakness of one-stage detectors: the overwhelming number of easy-to-classify background examples compared to the few actual objects. It introduced Focal Loss, a novel loss function that smartly reduces the weight of easy background examples during training. This forced the model to focus its attention on learning the tough-to-find objects, resulting in a major accuracy boost that finally allowed one-stage models to compete with two-stage detectors on accuracy while keeping their speed advantage.
How to Measure Model Performance Accurately
So, you’ve trained an object detection model. How do you actually know if it’s any good? Without the right measuring stick, you’re just guessing. To make real progress and choose the right model, you need to speak the language of evaluation metrics.
Everything starts with one surprisingly simple idea: Intersection over Union (IoU).
Understanding Intersection over Union (IoU)
Let's start with the absolute foundation of all object detection metrics. Imagine your model draws a box around a car, and you also have the "ground truth" box that a human drew perfectly. IoU is just a number between 0 and 1 that tells you how well those two boxes overlap.
Think of it as a Venn diagram for bounding boxes.
- Intersection: This is the area where the predicted box and the human-drawn box overlap.
- Union: This is the total area covered by both boxes combined, with no double-counting of the overlapping part.
IoU is simply the Intersection area divided by the Union area. A score of 1.0 is a perfect match, while 0.0 means they don't overlap at all.
This single score is what lets us decide if a model's prediction is a hit or a miss. We set a bar, called an IoU threshold—often around 0.5—to make the call. If a prediction’s IoU is above the threshold, we count it as a True Positive (TP). If it's below, it's a False Positive (FP). And if there was an object that the model completely missed, that’s a False Negative (FN).
The Accuracy and Speed Trade-Off
Once we can sort our predictions into these buckets (hits, misses, and false alarms), we can start calculating some really powerful metrics.
- Precision: This asks, "Of all the detections the model made, how many were actually correct?" High precision means your model doesn't cry wolf—it has a low rate of false positives.
- Recall: This asks, "Of all the real objects in the image, how many did the model actually find?" High recall means your model is thorough and doesn’t miss much.
Here’s the catch: there's almost always a tug-of-war between precision and recall. If you tweak your model to be super cautious about its predictions, you’ll probably boost your precision. But in the process, you might make it miss some less-obvious objects, which hurts your recall.
This is exactly why the go-to metric for most projects is mean Average Precision (mAP).
Instead of forcing you to choose between precision and recall, mAP rolls them into a single, comprehensive score. It gives you a balanced view of how your model performs across different confidence levels, effectively measuring the entire precision-recall curve. A higher mAP score simply means a better, more balanced model.
But accuracy isn't everything. A model that’s dead-on accurate but takes 10 seconds to process one picture is useless for a self-driving car. That’s where speed comes in, measured in Frames Per Second (FPS).
FPS tells you exactly how many images your model can analyze in a single second. For anything happening in real-time, like live security feeds or robotics, FPS is just as important as accuracy. Ultimately, choosing an object detection model is a masterclass in balancing these two competing forces: mAP (how good is it?) and FPS (how fast is it?).
Building Your High-Quality Dataset

Here’s a hard truth many teams learn too late: the most common point of failure for a computer vision project isn't the model architecture. It's the data. You can have the most powerful model in the world, but if you train it on a flawed dataset, it will fail.
Think of it this way. Your model is a brilliant student, and your dataset is its textbook. If that book is riddled with errors and fuzzy pictures, the student has no chance of passing the exam. That’s why the quality of your dataset often matters far more than whether you choose YOLO or Faster R-CNN.
The process starts with sourcing images and videos that truly represent the environment where your model will eventually be deployed. If you're building a system to spot defects on a factory line, you need images from that specific factory, under its unique lighting conditions. A model trained only on pristine, well-lit product photos will be useless on a real production floor.
After sourcing comes cleaning—weeding out corrupt files, blurry shots, and any other irrelevant data. But the most demanding and crucial phase is data annotation. This is the hands-on, meticulous work of drawing bounding boxes around every single object you care about and assigning it the correct class label.
The Annotation Pipeline and Common Pitfalls
Annotation is where your model’s knowledge of the world is literally created. It's a human-driven process that requires incredible precision and, above all, consistency. A bounding box that’s off by a few pixels might seem harmless, but when that small error is repeated across thousands of images, you introduce systemic noise that quietly cripples your model’s performance.
Some of the most common annotation mistakes we see include:
- Inconsistent Bounding Boxes: One annotator might draw a tight box around a person's body, while another includes the shopping bags they're carrying. This inconsistency leaves the model confused about what a "person" actually is.
- Incorrect Labels: A simple mistake, like labeling a delivery truck as a bus, directly teaches the model the wrong information.
- Missed Objects: In a crowded street scene, it’s easy to miss a person or a car in the background. Failing to label every single instance teaches the model that it's okay to ignore things, which leads to a high rate of false negatives.
- Occlusion and Edge Cases: How should you label a car that's 80% hidden behind a building? Without clear rules for these edge cases, your team's annotations will be all over the place.
These issues are exactly why achieving 99% annotation accuracy is the non-negotiable standard for any serious AI application. Even a 1% error rate can cause significant drops in performance, leading to unreliable and untrustworthy results. For a deeper dive, you can explore our guide on preparing high-quality data for training AI models.
Why Professional Annotation Services Are a Strategic Advantage
The history of object detection itself proves the need for massive, high-quality datasets. When the original YOLO model appeared in 2015, its ability to process images at 45 frames per second with 63.4% mAP was groundbreaking. But that performance was only possible because it was trained on millions of expertly labeled images.
For any business, creating that volume of data internally is a monumental undertaking. This is where an experienced partner becomes a strategic advantage, delivering the 99% annotation accuracy needed to build models that can reliably power your operations.
Building a world-class object detection model isn't just about code; it's about building a world-class dataset. Investing in high-quality data annotation is the single most effective way to ensure your AI project succeeds.
Finally, a well-prepared dataset often includes data augmentation. This technique expands your training data by creating slightly modified versions of your existing images—flipping them horizontally, adjusting the brightness, or rotating them. Augmentation makes your model more robust, helping it generalize better to real-world conditions instead of just "memorizing" the training examples.
Deploying Models and Practical Considerations
Getting a highly accurate object detection model trained up is a huge win, but it’s really just the halfway point. A model sitting on a server doesn't provide any business value until it’s out in the real world, making decisions. This is the deployment phase, and it’s all about navigating a crucial set of trade-offs between speed, cost, and power.
The very first question you have to answer is: where will this model live? This is the core of cloud vs. edge deployment. Think of it like deciding whether to hire a remote consultant who works from a powerful central office (the cloud) or an on-site technician who is right there where the action happens (the edge).
Cloud Deployment: Here, you send your data (like images or video feeds) to be processed on massive, powerful servers. This is a great fit for tasks that don't need an instant answer, such as analyzing large batches of stored video footage. You get access to nearly unlimited computing power without having to maintain the hardware yourself.
Edge Deployment: This means the model runs directly on the device—a smartphone, a camera in a factory, or a computer inside a vehicle. This is non-negotiable when speed is critical. It delivers the lowest possible latency (delay) and boosts privacy because the data never has to leave the device. For instance, a safety system that needs to stop a machine instantly to prevent an accident must run on the edge.
Optimizing for the Edge
Running a sophisticated model on a small, power-constrained device like a phone or an embedded chip is a serious engineering challenge. These devices have tight limits on processing power, memory, and battery life. This is where model optimization comes into play, using clever techniques to shrink your model and make it faster, all while trying to keep its accuracy high.
Two of the most common methods for this are:
Quantization: This is a bit like converting a massive, high-resolution audio file into a much smaller MP3. It reduces the precision of the numbers (weights) in your model, often from complex 32-bit floating-point numbers down to simpler 8-bit integers. This alone can shrink the model's size by up to 75% and make it run significantly faster.
Pruning: Think of this as an expert editor cutting out unnecessary words and sentences from a long document. Pruning algorithms identify and remove neural network connections (weights) that don't contribute much to the final outcome. This makes the model "sparser" and more efficient.
These optimization steps aren't just a technical clean-up at the end. You need to plan for deployment from day one. If you don't, you might build a fantastic model that is simply too big and slow to ever work in its intended environment.
This is where everything comes full circle—from your initial data annotation right through to the final application. The quality of the dataset you start with, which can be continuously improved with techniques like human-in-the-loop machine learning, has a direct impact on how well your model holds up after being optimized. A robust, well-trained model is far more resilient to the slight accuracy trade-offs that come with quantization and pruning, which ultimately leads to a successful real-world product.
Frequently Asked Questions
As teams dive into their first computer vision project, a few key questions almost always pop up. Getting these fundamentals right from the start can save you a ton of time and resources down the road. Let's walk through some of the most common hurdles we see.
How Much Data Do I Need to Train an Object Detection Model?
That's the million-dollar question, isn't it? The honest answer is: it depends. The complexity of your task is the biggest factor.
For a straightforward project, a great starting point is usually around 1,000 to 2,000 high-quality, annotated images for each object class. This is often enough to get a reliable proof-of-concept running.
But if you're dealing with something more nuanced, like spotting subtle differences between manufacturing defects or identifying objects in cluttered scenes, you’ll need a lot more data. In these cases, you might be looking at 10,000 images or more. The goal is to capture every possible variation the model might encounter in the real world—different lighting, weird angles, partial obstructions, you name it.
Should I Use a Pre-trained Model or Train from Scratch?
For just about any practical business use case, the answer is clear: start with a pre-trained model.
Training a model completely from scratch is a massive undertaking. It requires gigantic datasets (we're talking millions of images) and a staggering amount of computing power, making it completely impractical for most teams.
Instead, you can use a technique called transfer learning. You take a powerful model that's already been trained on a huge public dataset like COCO and then simply "fine-tune" it using your smaller, specialized dataset. This is the smart way to go for a few reasons:
- It’s way faster. You cut down training time and costs dramatically.
- You need less data. You can get impressive results with a fraction of the data you'd need if starting from zero.
- The results are better. You're building on top of the powerful visual "knowledge" the model already has, which almost always leads to higher accuracy.
What Is the Difference Between Object Detection and Instance Segmentation?
This one trips a lot of people up, but it’s a simple distinction. Both tasks find objects in an image, but they differ in how precisely they do it.
Object detection puts a simple rectangular bounding box around every object it finds. It answers the questions: What is this? and Where is it, generally?
Instance segmentation takes it a big step further. It creates a precise, pixel-by-pixel outline for each individual object. This gives you a much richer understanding of an object’s exact shape and size.
Think of it this way: object detection gives you a box, while instance segmentation gives you a perfect silhouette. The extra detail from segmentation is critical for things like robotic arm manipulation or measuring specific areas in medical scans.
Ultimately, a world-class object detection model is built on a foundation of world-class data. At Zilo AI, we specialize in providing the expert annotation needed to make sure your datasets are accurate, consistent, and ready for training. Talk to our team and let's get your next computer vision project started on the right foot.